Building GNUK and updating your FST-01 fw
As GNUK documentation says “Gnuk is an implementation of USB cryptographic token for GNU Privacy Guard”. It allows you not to have your private key available on the system, but allow you to use it. There are two ways to update your firmware, to use the script in the repo to do it, if your gnuk is functional or use the programmer to flash the binary.
Building the firmware
To build the firmware we need to clone the repository and because a part of it is a submodule we also need to fetch that.
git clone https://salsa.debian.org/gnuk-team/gnuk/gnuk.git
cd gnuk/
git submodule update --init
Now we have the whole code in the folder we can build it. First make sure that you have the following packages installed:
binutils-arm-none-eabi
gcc-arm-none-eabi
gdb-arm-none-eabi
libnewlib-arm-none-eabi
We need to configure the build. Go to the /src folder and run the configure command.
./configure --vidpid=234b:0000 --target=FST_01
This sets the USB vendor and product ID and sets the pcb we are using. If you run ./configure you can see other options available.
After running
make
in the /src folder we have a gnuk.bin file. And the reason why I am writing this blog post is the next command. From version 1.2.8 the binary generated still does not have the vid and pid included in the binary. I don’t really understand the reasons fully, but it has something to do with the way the USB licence or the rules of giving out vid and pid. Anyway we need to run
make build/gnuk-vidpid.elf
which will get us the final binary which is located at
src/build/gnuk-vidpid.bin
Flashing FST-01
I used the STlinkV2 clone to flash the firmware. First thing we need to do is to connect the board to the programmer. There are four connections ground ( brown wire in the picture ), power 3.3v ( red wire ), SWDIO ( orange wire ) and SWCLK ( short yellow wire).
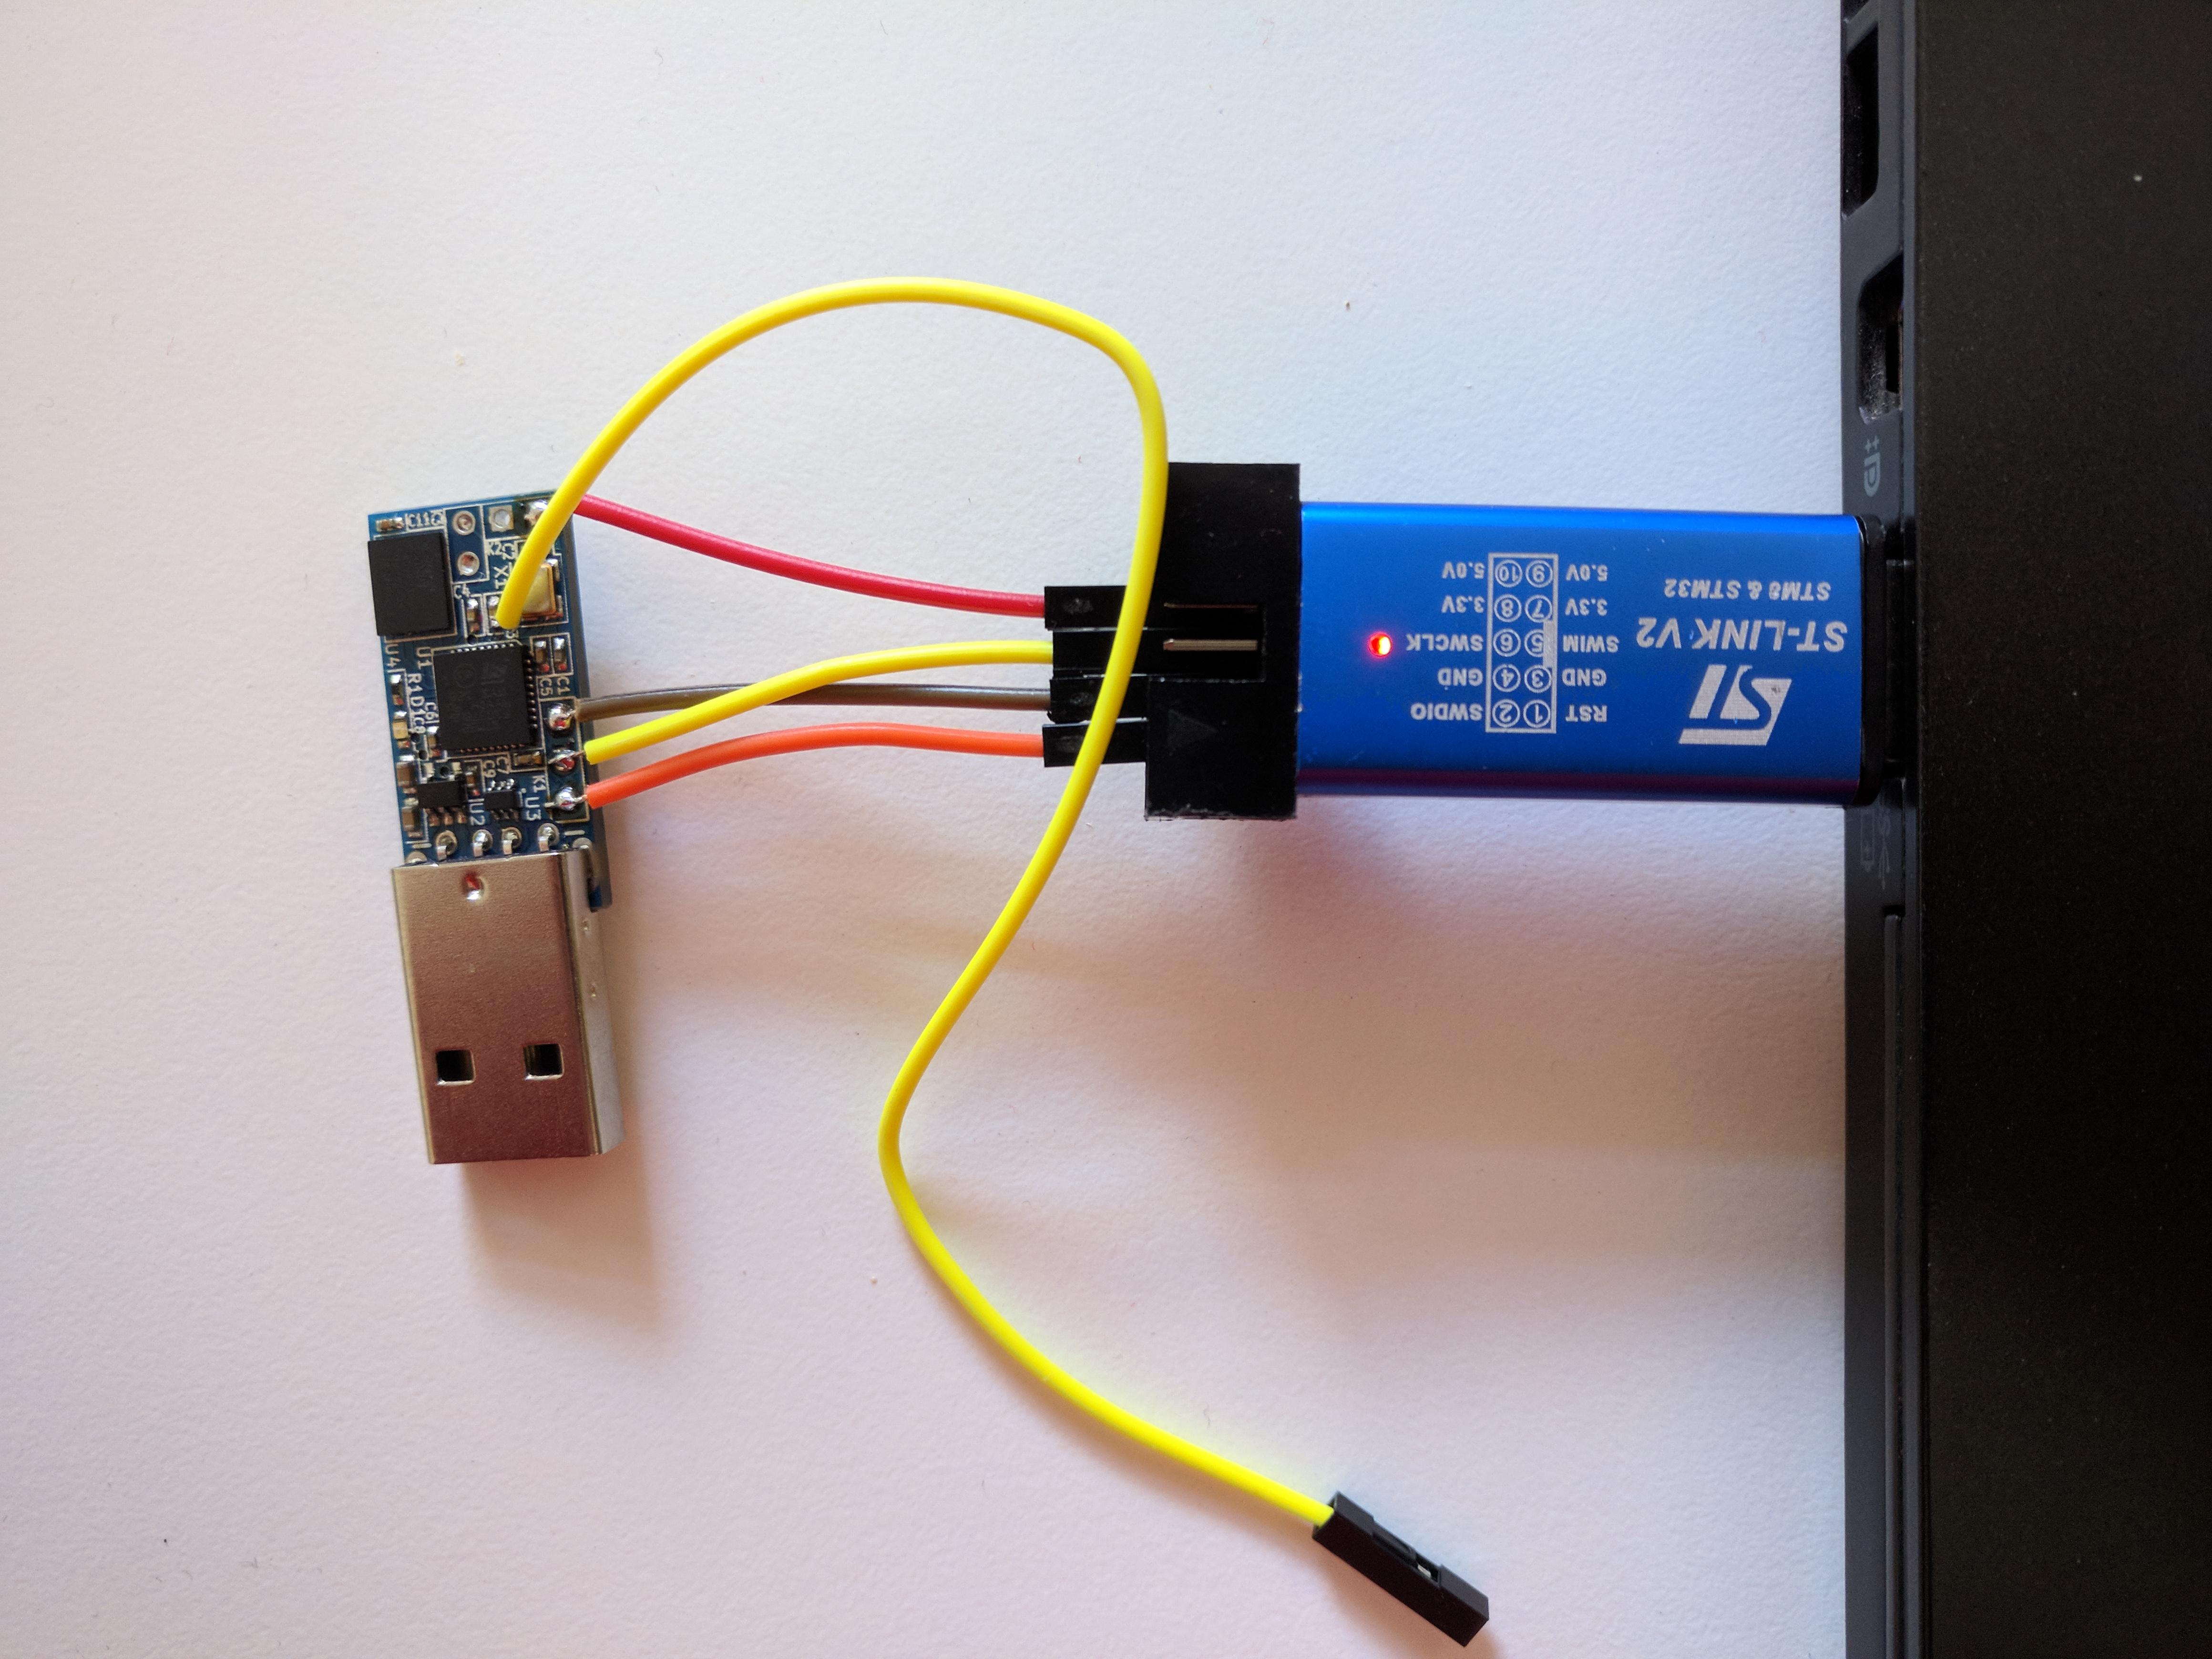
Just make sure that the pinout of the programmer is the same as mine if you are copying it directly. I have a couple of programmers and not all have the same pinout.
First we need to unlock the flash rom (which will also erase the rom)
sudo python2 ./tool/stlinkv2.py -u
will do it and before programming the microcontroller you need to power cycle the board.
I had some problems with this step. I was getting the error ValueError('Status of core is not halt.', 128), which means that the programming script can not halt the processor in a propper mode to continue the unlocking.
I managed to get out of that problem by running
sudo openocd -f /usr/local/share/openocd/scripts/interface/stlink-v2.cfg -f /usr/local/share/openocd/scripts/target/stm32f1x.cfg -c "init; reset halt; shutdown"
while holding the reset active and letting go in the middle of the process (that is the reason I have the other yellow wire ).
Ok and after that finaly we can run
sudo ./tool/stlinkv2.py /src/build/gnuk-vidpid.bin
After a power cycle you should have a functioning gnuk running on a FST01!
You can check if it is working by running
lsusb
And you should see vid and pid listed.